Are you tired of staring at that dull basement ceiling? Maybe it’s time to give your space a makeover! I created this post because I believe everyone deserves a cozy, inviting basement that reflects their style without breaking the bank. Whether you’re looking to create a home gym, a cozy movie room, or just a functional storage space, the ceiling can make a huge difference in the overall vibe of your basement.
If you’re someone who loves DIY projects or simply wants to spruce up an underutilized area of your home, this one’s for you. I’ve pulled together ten creative and budget-friendly basement ceiling ideas that are not only easy to implement but also add character to small spaces. These tips will help you transform that forgotten area into something special, making your basement a place you’ll actually want to spend time in.
Get ready to explore some unique design solutions that won’t empty your wallet! From bold paint colors to charming string lights, these ideas will inspire you to take action. You’ll discover how to use affordable materials and clever techniques to give your basement ceiling a fresh look. Let’s dive into these fantastic ideas that blend creativity with cost-effectiveness!
Key Takeaways
– Bold Colors: Painting your basement ceiling with vibrant colors can instantly elevate the space and create a cheerful atmosphere. Choose hues that complement your decor for a cohesive look.
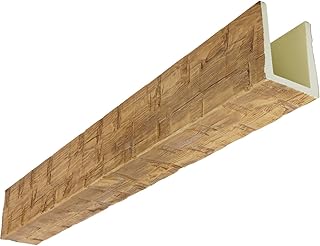
– Faux Beams: Installing faux beams adds texture and visual interest. They’re a simple way to create a rustic or modern feel without the hefty price tag of real wood.
– Fabric Drapes: Using fabric drapes can soften the harshness of a basement ceiling. Choose light fabrics to make the space feel airy and inviting.
– Repurposed Materials: Repurposing old wood or materials can add character and warmth. It’s a sustainable choice and can be a great conversation starter.
– Ambient Lighting: Adding string lights or other types of ambient lighting can create a cozy, inviting atmosphere. This can be an inexpensive way to enhance your basement’s overall appeal.
Recommended Products

Vertical aerosol for overhead professional projects

【All-In-One Complete Kit + 8FT Extension Rod】 Our ceiling paint roller kit comes with 1 high-quality roller (equipped with a dust-proof protective cover) and a 8FT stainless steel extension rod, which effectively doubles your painting efficiency. No more struggling with high ceilings or tall walls—this extension rod allows you to reach every high corner effortlessly, eliminating the need for ladders or additional tools. Note: The roller handle and extension rod are detachable for space-saving storage, while the brush head remains firmly fixed during use to ensure stable painting.

Self-Priming formula - requires no sanding
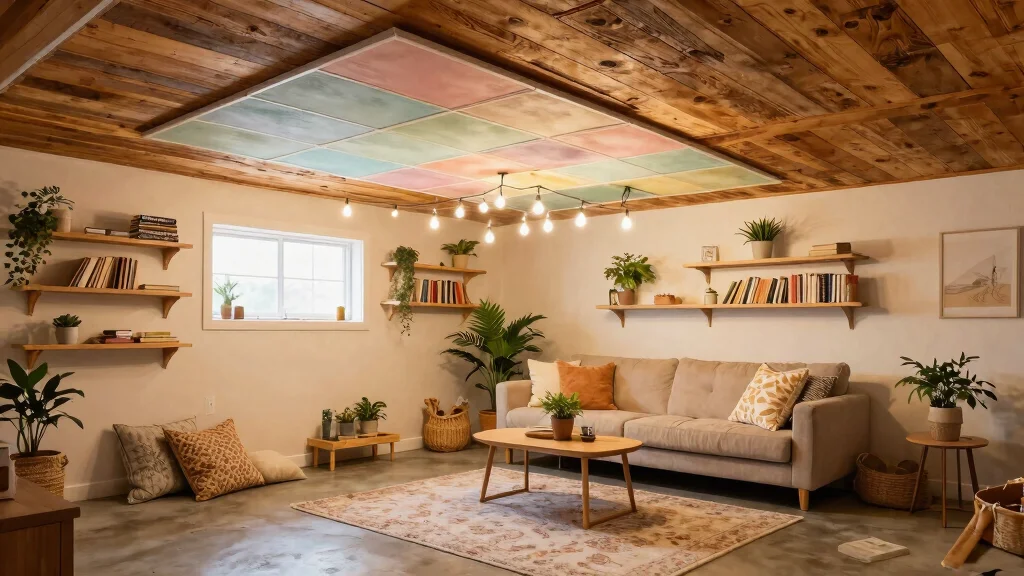
1. Paint the Ceiling with Bold Colors

Embrace the power of color! A bold ceiling can transform your basement into a vibrant sanctuary. Shades like deep navy or sunny yellow not only create a striking focal point but also foster a lively atmosphere. This technique enhances visual height, making the space feel more open and inviting.
To effectively implement this idea, consider using non-drip paint for a clean finish. Ensure the color complements your existing decor for a unified look. For an adventurous twist, try a two-tone effect by pairing the ceiling color with a statement wall.
Consider these tips:
– Choose a bold hue that resonates with your style.
– Coordinate with existing furniture for a cohesive vibe.
– Add a contrasting trim to define the edges.
This fun DIY project can infuse character into your space while being budget-friendly and enjoyable.
Recommended Products

Item Description: Heritage Timber Salvaged Timber Faux Wood Beam, 3-Sided (U-Beam), 5 1/2"W x 5 1/2"H x 72"L, Kona Brown Finish

Dimensions: 3-1/2 in. Width x 5-1/2 in. Height x 96 in. Length

Dimensions: 3-1/2 in. Width x 5-1/2 in. Height x 96 in. Length
Paint the Ceiling with Bold Colors
Editor’s Choice


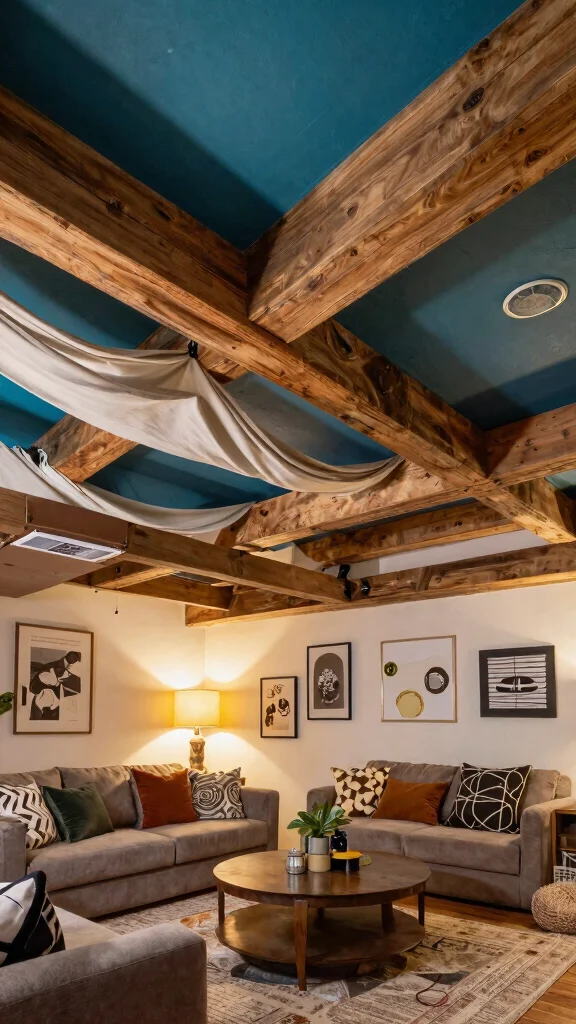
2. Install Faux Beams for Texture
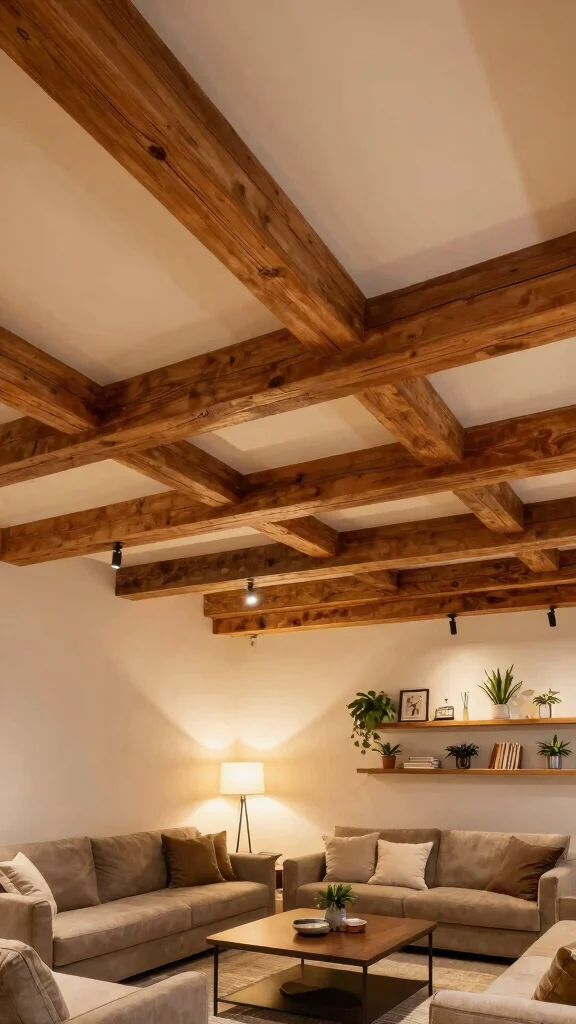
Faux beams are a clever way to introduce depth and warmth to your basement ceiling. Crafted from lightweight materials, they replicate the appearance of real wood without the hefty price tag. You can customize them by painting, staining, or leaving them natural to match your unique style.
To maximize their impact, consider using beams to create a coffered ceiling effect, which adds a touch of elegance. Position them strategically to draw the eye upward, enhancing the feeling of spaciousness. Installation is straightforward, often requiring just adhesive or screws.
Here are some suggestions:
– Incorporate beams to define different areas.
– Use a mix of sizes for added visual interest.
– Paint beams in a color that contrasts with the ceiling.
These charming accents will make your basement feel inviting and stylish.
Recommended Products

【Black Ceiling Draping Set】Pack of 6 black wedding ceiling drapes with lights (a set of 9.8ft warm white light), each ceiling draping panel measures 5 feet(60inch)wide x10 feet(120inch) long. Attach to the ceiling of the venue to soften the space and create a stunning fairytale atmosphere, transform any venue space.Drapes and fairy lights can be used for decoration on both indoor as well as outdoor events

Deep Champagne Ceiling Curtains Package Includes: The package will include 6 panels dark champagne wedding ceiling drapes (Not include stand), each wedding extra long curtain measures 5 feet (60inch)wide x 10 feet(120inch) long. 3 Size available can meet your demands for decorating your weddings, parties, receptions, help to create a full and layed sense to your wedding ceiling decoration

【Sage Green Ceiling Drapes for Wedding】: Packing list: 6 panels sage green chiffon backdrop drapes, each panels size 5ftx20ft, the top of the drapes comes with a rod pocket for easy installation, the 4-inch diameter sewn rod pocket is suitable to fit any standard size curtain rod, Can hung vertically or horizontally.
Install Faux Beams for Texture
Editor’s Choice


3. Use Fabric Drapes for Softness

If you want to soften the rigid lines of your basement ceiling, draping fabric is an excellent solution. This affordable option adds elegance and a cozy touch, transforming your basement into a welcoming retreat. You can choose from sheer or opaque fabrics to balance light and privacy.
To achieve the best effect, select fabrics that harmonize with your color scheme. Hang them from a curtain rod or directly from the ceiling for a flowing appearance. Mixing different fabrics can create a beautiful layered look that enhances your design.
Consider these ideas:
– Use light fabrics for a breezy, airy feeling.
– Layer textures for added depth.
– Secure drapes with decorative clips for a polished finish.
Draped ceilings not only elevate your style but also help absorb sound, making your space more tranquil.
Recommended Products
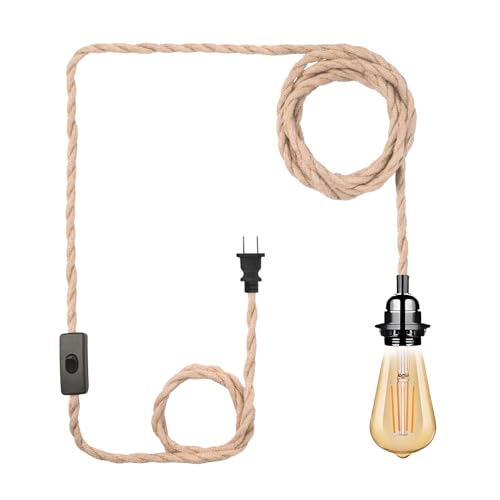
[Plug in Pendant Light Cord] - 15FT Plug in hanging light kit with E26/E27 socket, compatible with all types of E26/E27 bulb (NOT Included), Max 60W, 120V

【MULTIPURPOSE USE】Our light hanging kit can be used in multiple ways such as hanging string lights for a romantic party, photos or any hanging needed. And you can design different lighting suspension types to enhance the visual effect according to the layout of your yard. Use your imagination and enjoy the fun of DIY.

Outdoor light hanging kit:this cable (7x7) bare OD is 1/16",coated OD is 3/32";it has outdoor string lights 100ft weatherproof, wire hanging kit,string light cable,string light hanging kit black wire,stainless,string light hanging kit stainless and so on.outdoor light guide wire,globe string light hanging suspension kit
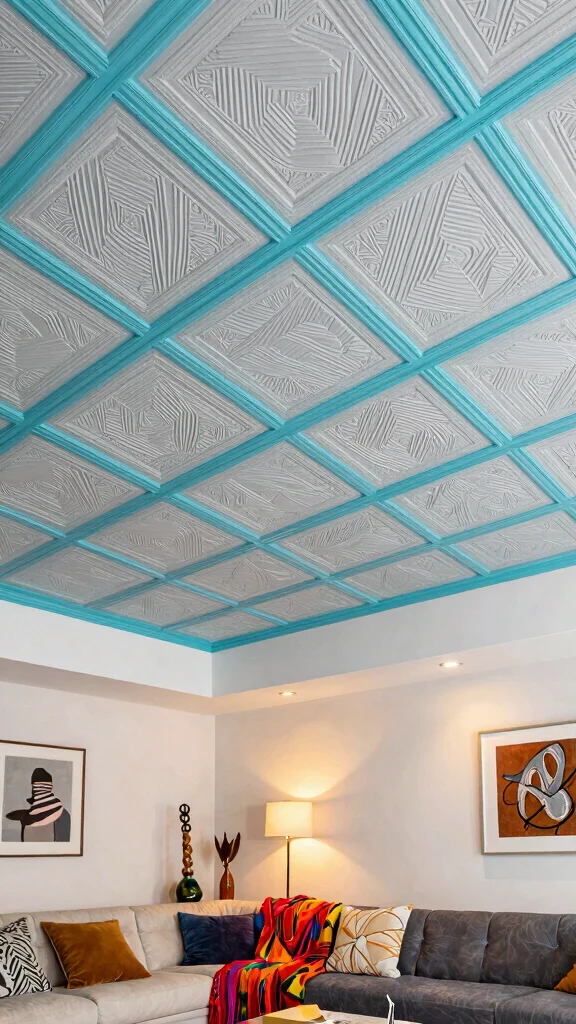
4. Create a Tin Tile Effect
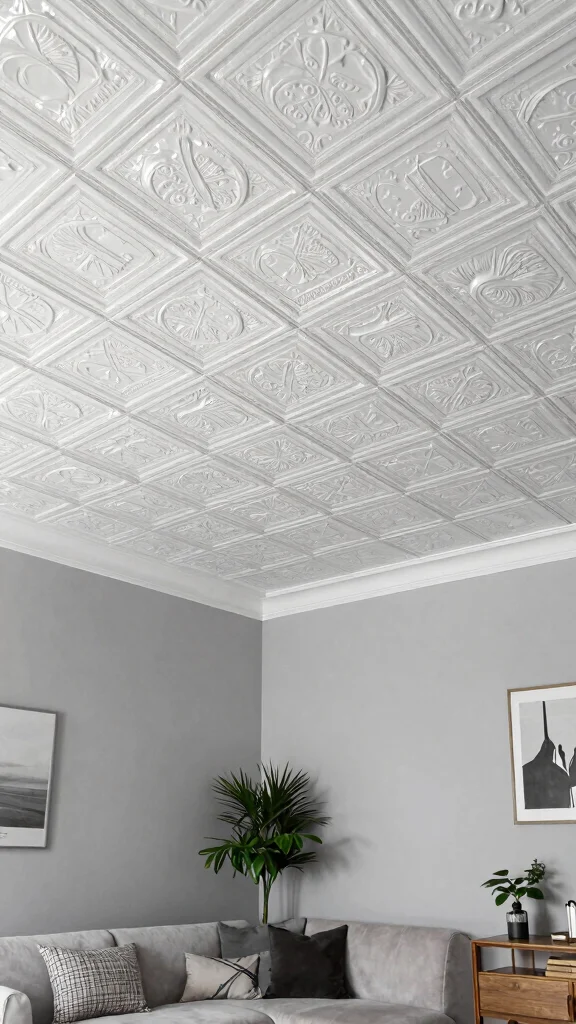
For a vintage charm that’s budget-friendly, faux tin tiles can be the perfect addition to your basement ceiling. Available in diverse patterns and finishes, these tiles offer a stylish way to introduce glamour and character. They are easy to install and can be painted to match your decor seamlessly.
This look works well because tin tiles reflect light, providing an illusion of height. Their durability makes them a practical choice for long-term use. Opting for removable tiles allows for easy updates without significant renovations.
Here are some suggestions:
– Choose intricate patterns for added visual appeal.
– Paint tiles in a color that complements your walls.
– Arrange tiles in a unique layout for a personalized touch.
This creative project allows you to express your style while staying within budget.
Tin tile ceilings fit the bill for basement ceiling ideas on a budget. Faux tin tiles add vintage charm, reflect light, and visually raise the ceiling. They’re easy to install and even removable, making updates simple as your space grows.
Recommended Products

Residential Use Only: Made for residential ceilings, made of soft foam not for commercial use

Made for residential ceilings, made of soft foam not for commercial use.

Residential Use Only: Made for residential ceilings, made of soft foam not for commercial use
Create a Tin Tile Effect
Editor’s Choice
![American Tin Ceilings [5-Pack Kit] Nail-Up Metal Tiles in Pattern #2 Nai...](https://m.media-amazon.com/images/I/712kGJ5bFlL._AC_UL320_.jpg)

![American Tin Ceilings [5 Pack] 24](https://m.media-amazon.com/images/I/61rHsCLF8dL._AC_UL320_.jpg)
![American Tin Ceilings [5 Pack] 100% Metal Tin Tiles Backsplash Kit - Pat...](https://m.media-amazon.com/images/I/61uXeSG0fnL._AC_UL320_.jpg)
![American Tin Ceilings [5 Pack Kit] 24](https://m.media-amazon.com/images/I/71u5SM482JL._AC_UL320_.jpg)
5. Repurpose Old Wood for a Rustic Feel
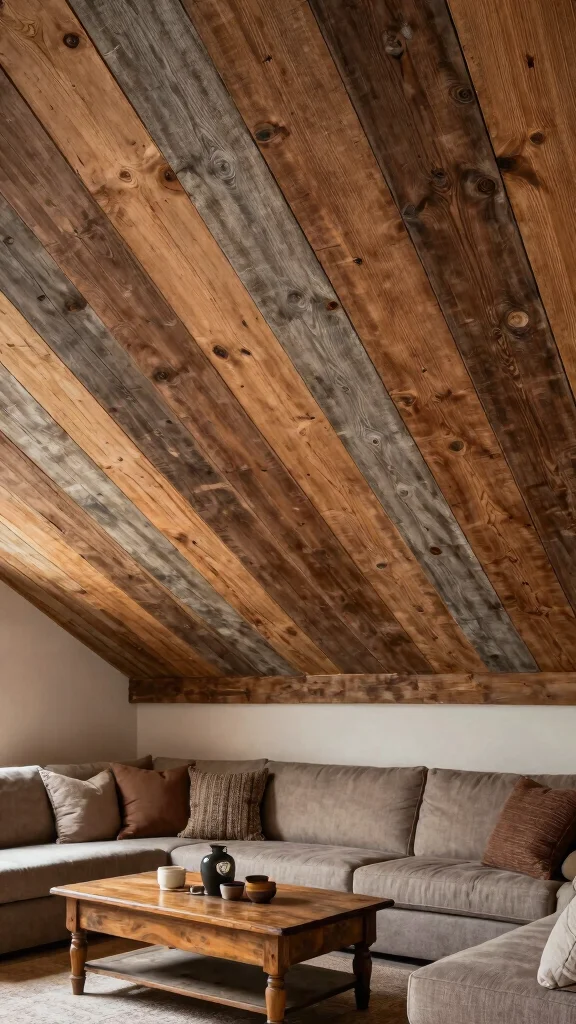
Bring warmth and character to your basement ceiling by repurposing old wood. This eco-friendly choice adds a rustic vibe while reducing waste. Whether you’re using barn wood, pallets, or leftover lumber, a wood ceiling introduces a cozy atmosphere that invites relaxation.
As you embark on this project, remember to sand and treat the wood to avoid splinters and ensure longevity. Applying a clear sealant can preserve the natural look while protecting the surface. Mixing different wood types can create a stunning patchwork effect.
Consider these tips:
– Use varying widths of wood for a dynamic appearance.
– Stain the wood for a richer finish.
– Hang decorative elements to enhance the rustic feel.
This approach not only looks beautiful but also supports sustainability in your home.
Recommended Products

Ready-mixed, grab-n-go white ceiling paint

Ceiling spray paint blocks stains and primes interior surfaces for quick touch ups

Package Includes: This complete paint roller kit with extension pole includes a durable roller shield and a premium roller cover, designed for clean painting results with minimal splatter. The sturdy blue splash guard combined with an adjustable roller head delivers smooth control, making it an ideal ceiling paint roller no drip kit for both beginners and professionals tackling any house painting kit project.
You might also like

6. Go for a Drop Ceiling with Style
A drop ceiling offers both practicality and style, providing easy access to plumbing and electrical systems. You can elevate the aesthetic by selecting stylish tiles or painting the framework in a vibrant hue. With numerous designs available, drop ceilings can also enhance sound absorption, creating a peaceful atmosphere.
To make the most of this option, choose tiles with patterns or textures to add depth. Bright colors on the grid can create an eye-catching contrast. Incorporating accent lighting can further enhance the overall design and ambiance.
Here are some ideas:
– Mix tile designs for a custom look.
– Use colored lighting to highlight features.
– Add trim for a polished finish.
This solution combines functionality and style, making your basement a more enjoyable space.
Recommended Products

Item Description: Heritage Timber Salvaged Timber Faux Wood Beam, 3-Sided (U-Beam), 3 1/2"W x 3 1/2"H x 72"L, Warm Caramel Finish

Complete 8-foot Coverage for Versatile Installations: this set includes two 48-inch beams, offering a combined 8 feet of coverage; Ideal for ceiling spans, entryways, hallways, or accent walls, you can install them side by side for a continuous run or use them separately for creative, staggered layouts; This flexibility allows you to tailor the faux wood beams for ceiling projects to fit various architectural spaces without needing custom sizing

Authentic Sand Blasted Detailing: Designed from real barn beam molds, each beam showcases swirling wood grain patterns and subtle distressing that mimic genuine weathered oak, bringing warmth and texture to any space.
📹 Related Video: A Drop Ceiling that Looks Better Than Drywall! (How to Install a Drop Ceiling in a Basement – DIY)
Difficulty Rating & Requirements
Overall Difficulty Rating: Medium
This project rates as medium in difficulty. It’s suitable for DIY enthusiasts with some experience in home improvement. While many tasks are manageable for beginners, certain elements like installing drop ceilings or working with faux beams may require a bit more skill and precision. If you have basic knowledge of tools and materials, you can enjoy these creative basement ceiling ideas without feeling overwhelmed.
Time Estimate:
⏱ Estimated time: 1 to 3 days. Depending on the complexity of your chosen design, here’s a quick breakdown:
– Preparation & Planning: 1-2 hours to gather materials and measure your space.
– Installation: 4-8 hours depending on the ceiling type (faux beams, drop, etc.).
– Finishing Touches: 1-3 hours for painting, decorating, or adding lights.
Skill Requirements:
– Required skills: Basic carpentry, painting, measuring, and possibly some electrical work for lighting.
– Beginner-friendly: Yes! While some projects may require additional skills, many tasks can be tackled by someone with basic DIY knowledge.
– Skills that can be learned: Painting techniques, using adhesive materials, and basic electrical work for lighting. Skills that require experience include precise cutting and installing ceiling tiles or beams.
Tools & Materials Needed:
🧰 Essential items checklist:
– Measuring Tape (Required) – For accurate measurements of your space.
– Level (Required) – Ensures that everything is straight and even.
– Paint and Brushes/Rollers (Required) – For a fresh coat on your ceiling or beams.
– Faux Beams or Plywood Panels (Required) – For adding texture.
– Adhesive or Nails (Required) – Depending on your material choice for installation.
– String Lights (Optional) – For ambient lighting to enhance the look.
– Drop Ceiling Tiles (Optional) – If going for a modular drop ceiling design.
– Fabric Drapes (Optional) – For a soft, cozy feel if fabric is chosen.
Step-by-Step Overview:
1. Planning and Measurement (1-2 hours): Measure your basement ceiling and decide on the design you want. Sketch out your plan to visualize it better.
2. Material Gathering (2-3 hours): Shop for your materials. Ensure you have all necessary items before starting to avoid interruptions.
3. Installation (4-8 hours): Start with your main task, whether it’s painting, installing faux beams, or a fabric drape. Follow safety measures and instructions carefully.
4. Finishing Touches (1-3 hours): Add decorative elements like string lights or drapery. Paint any additional features and ensure everything is tidy.
Professional vs DIY:
If you choose to hire professionals for basement ceiling installation, costs typically range from $1,500 to $4,000 depending on the complexity. DIY costs can be significantly lower, often under $500 if you use budget-friendly materials. It’s worth considering your time, skill level, and budget when deciding whether to tackle this project yourself or seek professional help. If you’re confident with tools and have a vision, a DIY project can be both rewarding and cost-effective!
Recommended Products

【10 Panels White Ceiling Fabric】Pack of 10 panels white wedding drape curtain(without hanging pieces), each wedding extra long curtain measures 5 feet(60inch)wide x20 feet(240inch) long.The sufficient quantity can meet your demands for decorating your weddings, parties, receptions, and these white ceiling drapes for weddings will create a delicate and aesthetic sense to your wedding ceiling decoration and light up every banquet.

WHAT WILL YOU RECEIVE: 2 Panels Wedding Arch Drapery Fabric, Size: 30 Inch x 20ft (Pre-cut). Available Color: Sage Green, Dusty Blue, Ivory, Black, Dusty Rose, White, Champagne, Burgundy, Blush Pink, Lilac. Soft and lightweight, chiffon draping fabric is a great choice for wedding arch decorations, creating a romantic and elegant atmosphere.

UPLIFTS YOUR PARTY DECOR Rich and elegant - Made of sparking White Chiffon. Pack of 6 drapes, each 5 x 10 ft. Ideal ceiling drapes hanging kit for any event
7. Install Plywood Panels for a Sleek Look
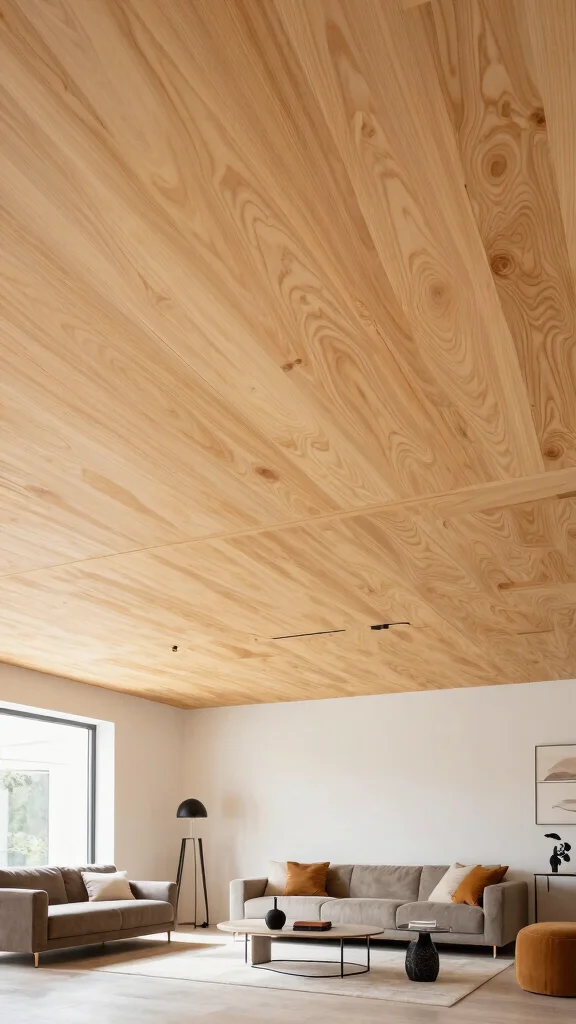
For a contemporary touch, consider plywood panels on your basement ceiling. This cost-effective solution can turn an ordinary ceiling into a sophisticated design feature. You can keep the panels natural for a minimalist vibe or paint them for a splash of color.
To create a clean look, use large panels that provide a seamless appearance. Experiment with various finishes, such as varnish or matte paint, to suit your style. Adding indirect lighting can cast beautiful shadows, enhancing the overall effect.
Here are some tips:
– Combine different panel orientations for visual interest.
– Use lighter colors to make the space feel larger.
– Incorporate hidden lighting for added drama.
This approach is not only stylish but also perfect for budget-conscious DIYers.
Fun fact: plywood panels can slash basement ceiling costs by up to 50% compared to drywall, while delivering a sleek, seamless look. Pair them with indirect lighting to cast dramatic shadows and elevate a small space without breaking the bank.
Recommended Products
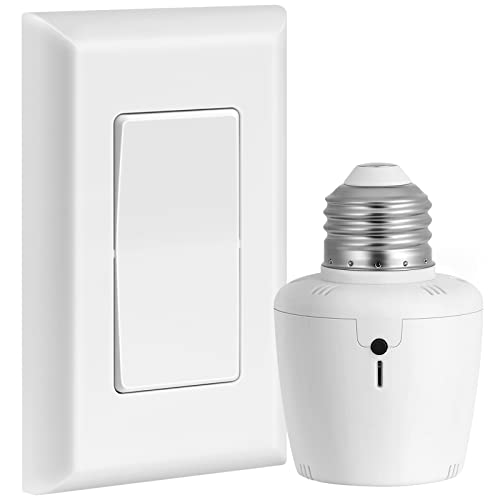
Add Wall Switches to Your Light Bulbs without Wiring: Suraielec wireless light switch socket kits eliminate the need for wiring between lights and switches; easily control pull chain string lights, ceiling lights, and lamps without altering existing systems; no in-wall wiring, WiFi, or fixture replacement required

【Safe and durable】100fts PVC stainless steel cable is insulated and waterproof, cable bare outer diameter is 1/16", coated outer diameter is 3/32". Breaking Strength is 480lbs. Ideal as a string light hanging kit for heavy outdoor use.

Adjustable light hanging kit can be freely adjusted in length by pressing the tip ofthe wire rope clamp, rolling up or trimming the lighting suspension chains
Install Plywood Panels for a Sleek Look
Editor’s Choice


8. Use Wallpaper for a Unique Twist
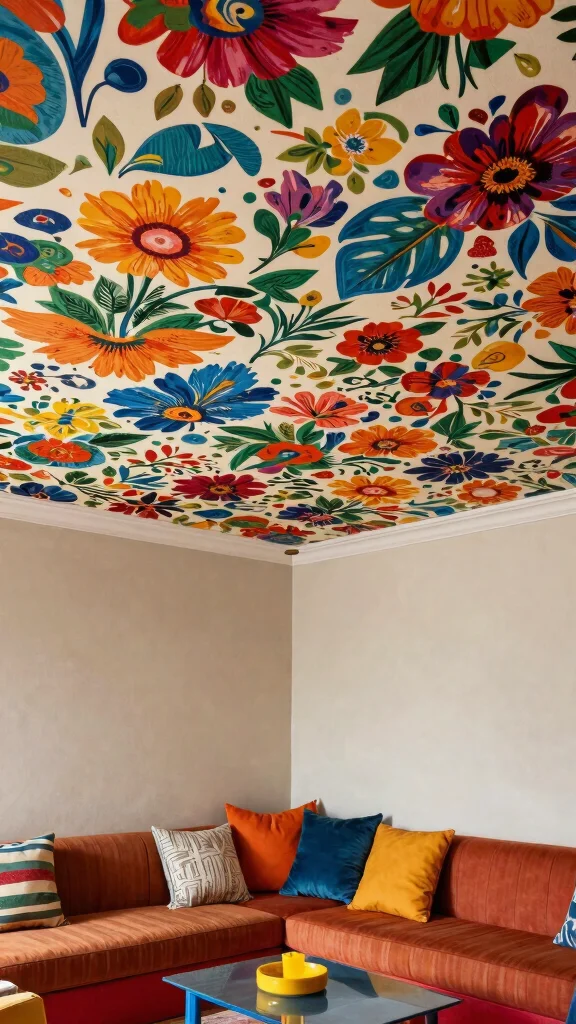
Think outside the box with wallpaper on your basement ceiling! A bold or patterned wallpaper can add flair and personality, transforming your space in an unexpected way. Choose playful designs or textured finishes that reflect your style and create a unique ambiance.
To ensure easy updates, consider using removable wallpaper. Metallic finishes can add a touch of glamour, while combining patterns can create an intriguing layered effect. This creative approach allows you to personalize your basement beautifully.
Here are some tips:
– Match wallpaper with your existing decor for cohesion.
– Use wallpaper borders to define edges.
– Pair with other ceiling elements for a dynamic look.
This project can be both fun and impactful, providing a fresh perspective on your space.
Recommended Products

Residential Use Design: Made of soft foam material specifically designed for residential ceilings, not intended for commercial applications

Residential Use Only: Made for residential ceilings, made of soft foam not for commercial use

Residential Use Only: Made for residential ceilings, made of soft foam not for commercial use
9. Add String Lights for Ambiance
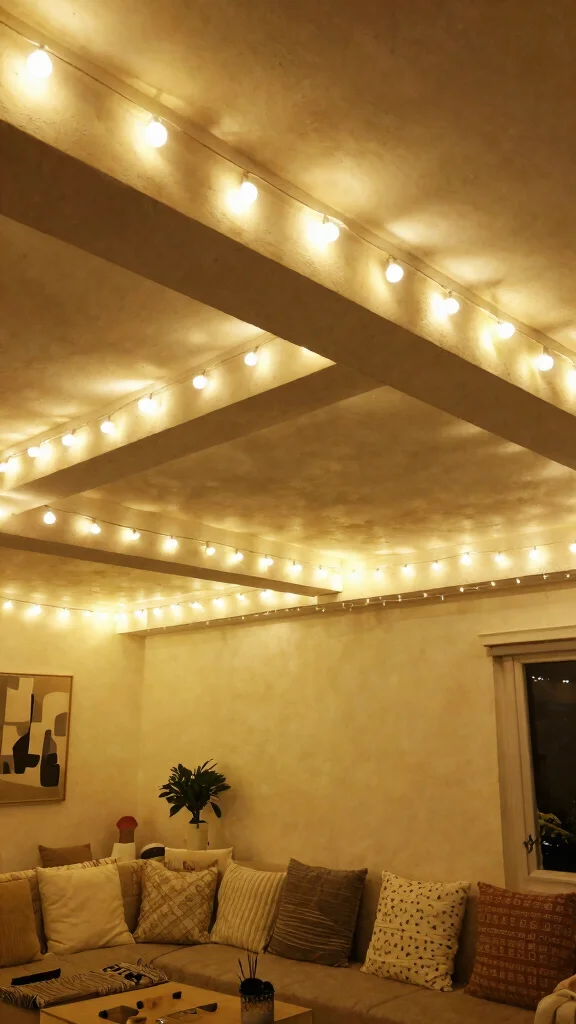
Lighting can make all the difference in your basement! String lights can introduce warmth and charm, creating a cozy atmosphere ideal for gatherings or relaxation. Drape them over beams, zigzag them along the ceiling, or create a canopy effect for a magical touch.
To achieve the best ambiance, opt for warm white lights that provide a soft glow. Battery-operated lights offer easy installation without the hassle of cords. Mixing string lights with other lighting elements can create layered effects for added depth.
Consider these ideas:
– Hang lights at varying heights for a whimsical look.
– Use outdoor string lights for a rustic feel.
– Create patterns with the lights for visual interest.
This affordable decor idea can instantly enhance your basement’s inviting atmosphere.
When you’re hunting basement ceiling ideas on a budget, string lights are a game changer. Warm white bulbs create instant ambiance, draped over beams or in a canopy, making the space feel cozy without a big redo.
Add String Lights for Ambiance
Editor’s Choice


10. Embrace Minimalism with a Clean Finish

Sometimes, simplicity reigns supreme! A minimalist ceiling can bring a sense of calm and clarity to your basement. Opt for a crisp, white finish that reflects light and enhances the spaciousness of the area. Pair it with modern furniture to create a subtle yet sophisticated backdrop.
To maintain this minimalist aesthetic, choose simple light fixtures that don’t overwhelm the space. Keep the ceiling and walls free from clutter, promoting a sense of openness. Using a single color palette can unify the overall appearance.
Consider these tips:
– Incorporate hidden lighting to maintain clean lines.
– Use a single material for a cohesive look.
– Limit decorative elements for a sleek design.
This minimalist approach can be both stylish and rejuvenating, making your basement a serene retreat.
Conclusion
Revamping your basement ceiling doesn’t have to be a daunting task. With these budget-friendly and creative ideas, you can transform your space into a stylish retreat that reflects your personality. Whether you choose vibrant paint colors, rustic wood, or elegant fabric, the options are endless and perfectly suited for small spaces.
Now it’s time to roll up those sleeves and get started on your DIY basement ceiling project!
Note: We aim to provide accurate product links, but some may occasionally expire or become unavailable. If this happens, please search directly on Amazon for the product or a suitable alternative.
This post contains Amazon affiliate links, meaning we may earn a small commission if you purchase through our links, at no extra cost to you.
Frequently Asked Questions
What are some affordable basement ceiling ideas for small spaces?
Small basements benefit from ceiling ideas that brighten the space without costing a fortune. For basement ceiling ideas on a budget, try these DIY-friendly options:
1) Paint the concrete ceiling with a moisture-resistant ceiling paint to instantly lift the mood.
2) Install lightweight PVC or foam ceiling planks for a clean look that’s easy to install yourself.
3) Use beadboard or tongue-and-groove panels for warmth and texture while staying affordable.
4) Consider a low-profile drop ceiling to hide ducts and wiring, keeping access for basement remodeling tips in mind.
5) Add texture with fabric panels, cork tiles, or reclaimed wood slats for a creative ceiling materials vibe.
Always check moisture and plan lighting to avoid a dim, cramped feel.
What DIY ceiling solutions work best in basements with low ceilings?
For rooms with limited headroom, look for DIY ceiling solutions that stay slim and bright:
• A painted concrete or plaster ceiling to reflect light and avoid bulk.
• A lightweight drop ceiling or modular tiles that give access to plumbing without adding height.
• Beadboard panels or slim tongue-and-groove planks that sit flush with minimal depth.
• Fabric or acoustic panels mounted on a frame can soften sound without a chunky profile.
• PVC ceiling planks or metal-look panels for moisture resistance and quick install.
Pro tips: choose bright colors, install strong lighting, and measure clearance before you start.
Which materials offer the most creative and low-cost options for basement ceilings?
Creative ceiling materials can transform a basement on a budget. For creative ceiling materials that won’t break the bank, try:
• PVC foam planks or tiles that mimic wood or tin at a fraction of the price.
• Beadboard, shiplap, or fiberboard panels for a warm, classic look.
• Reclaimed wood slats if you source locally; sand and seal to resist moisture.
• Cork tiles or fabric panels for texture and sound control.
• Metal-look corrugated panels for an industrial vibe.
Tip: pair with bright lighting and moisture control for long-lasting results.
What basement remodeling tips should I consider when updating ceiling design?
Great question. Here are practical basement remodeling tips to maximize impact on a budget:
• Start with the ceiling first—it’s the room’s visual framework.
• Check moisture and insulation to prevent future headaches; invest in a vapor barrier if needed.
• Choose a ceiling type that fits your ceiling height and access needs (painted concrete, drop ceiling, or PVC planks).
• Use light colors and layered lighting to brighten the space and make it feel larger.
• Plan a cohesive look with walls and flooring so affordable basement design feels intentional.
How can I install affordable basement ceiling ideas myself without professional help?
Yes, you can DIY many basement ceiling ideas on a budget. Here’s a simple path:
1) Verify moisture and shut off utilities where you’ll work.
2) Pick a lightweight system (painted concrete, PVC planks, or a drop ceiling with slim tiles).
3) Gather the basics: level, screws, studs, and a drill; use furring strips if you’re mounting panels to an uneven ceiling.
4) Install in steps, starting from one corner, and use a stud finder to anchor tracks if you go with a drop ceiling.
5) Seal seams, touch up with paint, and add bright LED lighting for an airy feel.
With patience and a little planning, you’ll achieve low-cost decor ideas that transform your space.
Related Topics
home decor
basement ceiling ideas
budget friendly
DIY ceiling solutions
small spaces
affordable design
creative materials
basement remodeling
easy updates
low-cost decor
beginner friendly
trending home styles