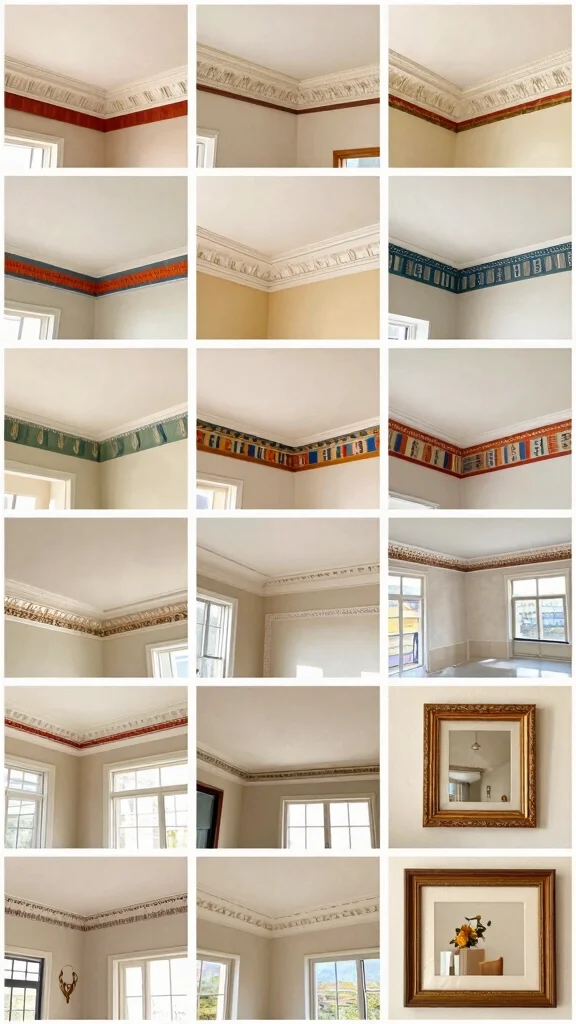
Creating a stunning room often begins from the top down. When you think about your home decor, the ceiling might not be the first thing that comes to mind, but it plays a vital role in setting the tone of your space. If you’re looking to elevate your interior design game, then consider adding beautiful ceiling borders. These decorative accents can transform an ordinary room into something truly special.
This post is for anyone who loves vintage styles or wants to spice up their home with some charming architectural details. Whether you are a seasoned decorator or just starting out, you’ll find that these ceiling border ideas not only enhance the atmosphere but also reflect your personal style. From ornate plaster moldings to bold color accents, there’s something here for everyone.
By exploring these twelve ceiling border ideas, you will gain inspiration and practical tips to frame your room beautifully. Prepare to learn about various ceiling trim designs, decorative edges, and room framing techniques that can make a significant impact. Say goodbye to boring ceilings, and get ready to create stunning interior design accents that will have your guests talking.
Key Takeaways
– Explore Vintage Options: Consider ornate plaster moldings and vintage tin tiles for a timeless look that adds elegance to any room.
– Incorporate Color: Bold color accents can create a dramatic effect and set the mood of your space, making it more inviting and lively.
– Mix Materials: Use wood beams with decorative trim or fabric-covered borders to add texture and warmth to your ceilings, enhancing the overall design.
– Get Creative: Try using vintage picture frames or lattice ceiling panels to create unique borders that showcase your personality and style.
– Tailor Your Design: Custom starburst borders and arched ceiling details can turn your ceiling into a focal point, giving your space a unique architectural touch.
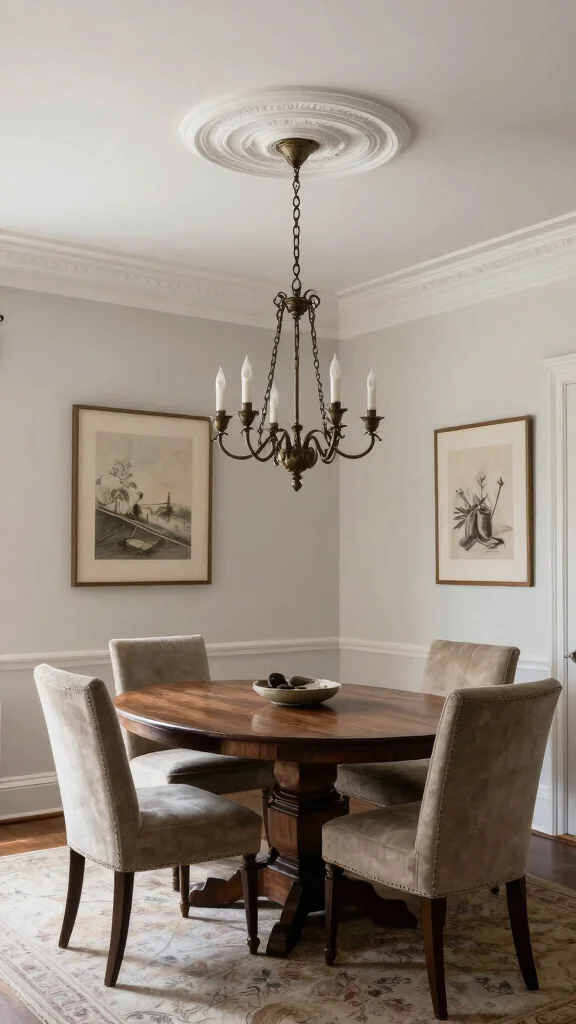
1. Ornate Plaster Moldings
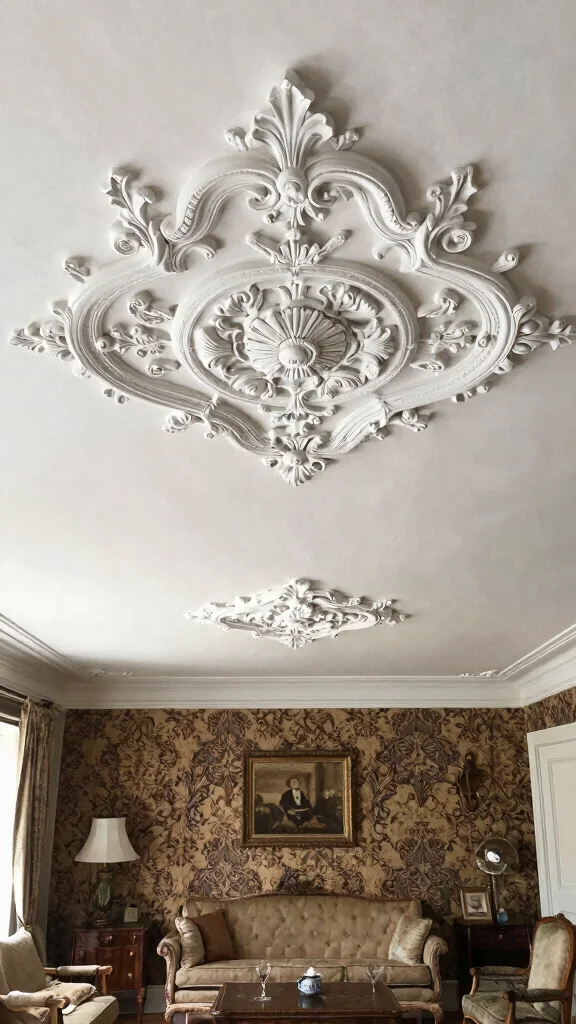
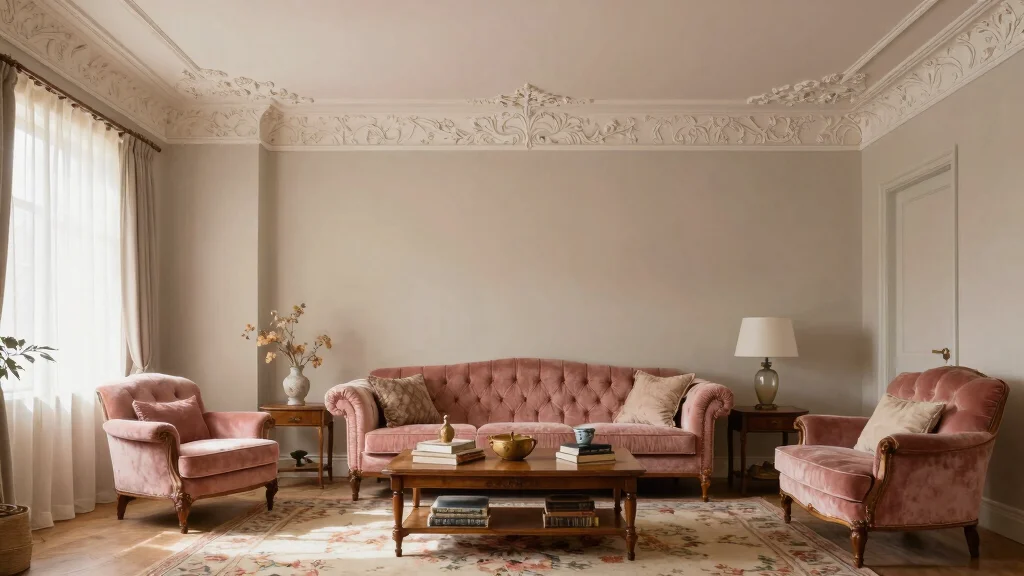
Ornate plaster moldings bring a touch of luxury and history to your ceilings, acting as stunning focal points that elevate any room. Their intricate designs, often featuring floral motifs and geometric shapes, create a sense of elegance and charm, inviting admiration. You might envision them gracing the dining room or living area, where they add sophistication and warmth in equal measure. Whether you choose to contrast with bold colors or maintain a classic white finish, these moldings can beautifully define your space.
To implement this look, consider carefully assessing your room’s style and selecting moldings that complement it. For a budget-friendly twist, you can enhance existing moldings with a simple plaster finish to breathe new life into them.
Consider these ideas to maximize their impact:
– Pair ornate moldings with rich wall colors for dramatic contrast
– Install them in corners to create an elegant frame
– Use contrasting paint to highlight intricate designs
– Incorporate LED strips for a modern touch
This approach not only enhances visual interest but also contributes to a rich, textured atmosphere in your home.
Fun fact: ornate plaster moldings can visually boost ceiling drama by framing light and shadows, part of timeless ceiling border ideas, sometimes making the room feel up to 2 inches taller. Pair them with white or bold colors to emphasize floral motifs and geometric shapes—instant luxury.
Ornate Plaster Moldings
Editor’s Choice


2. Wood Beams with Decorative Trim
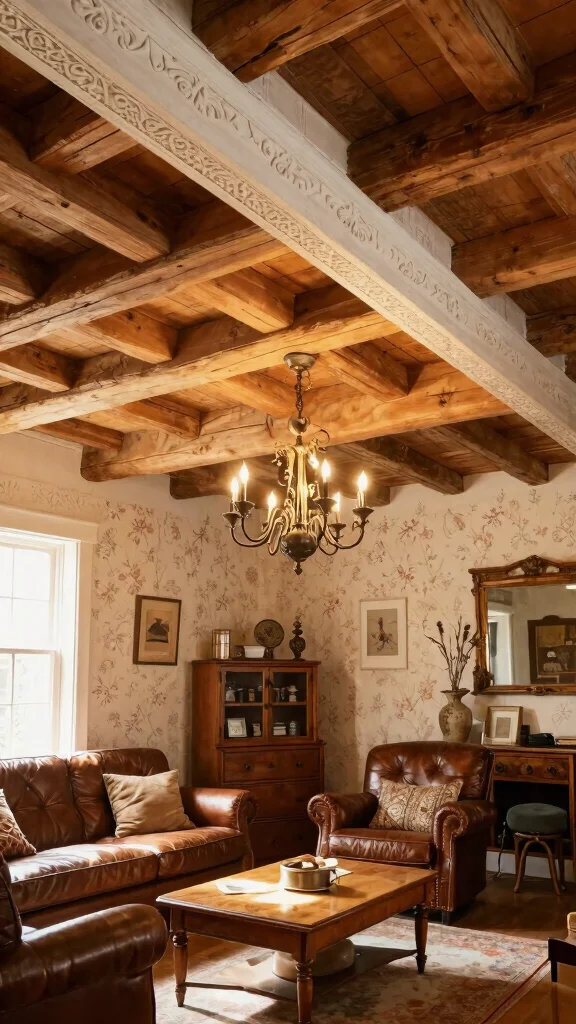
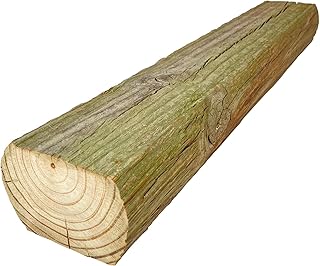
Wood beams paired with decorative trim add a rustic yet refined appeal to your ceilings, creating an inviting atmosphere that feels both warm and stylish. The combination of natural wood and intricate trim can transform a plain ceiling into a captivating focal point, perfect for country or farmhouse aesthetics. Imagine the charm of reclaimed wood beams enhancing your space, while soft whites or muted pastels in the trim bring a touch of romance.
For practical implementation, look for reclaimed wood options that tell a story while being eco-friendly. Decorative trim can be sourced from local hardware stores, making it easy to add character without breaking the bank.
Try these elements to create a cozy ambiance:
– Install reclaimed beams across the ceiling for a rustic feel
– Use decorative trim to highlight the beam edges
– Paint trim in soft colors to enhance vintage charm
– Incorporate vintage lighting for added warmth
This approach blends natural beauty with artistic flair, creating spaces that feel both inviting and elevated.
Wood Beams with Decorative Trim
Editor’s Choice


3. Bold Color Accents
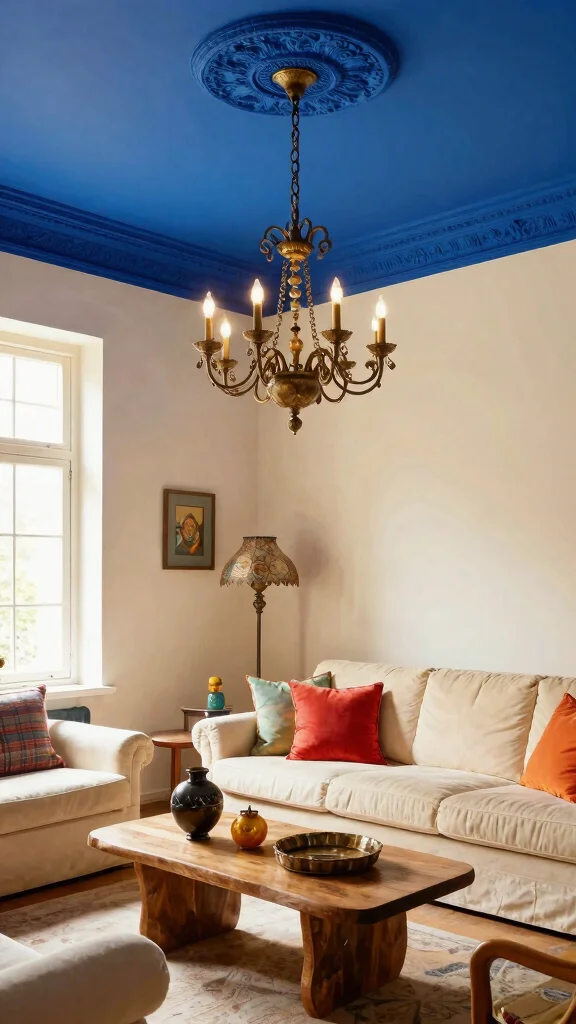
If you want to make a striking impression, bold color accents in your ceiling border can completely transform your room’s ambiance. Vibrant hues like deep navy or rich crimson provide stunning contrasts against lighter walls, infusing energy and personality into your space. This technique shines in modern homes or vintage-inspired interiors, especially when paired with eclectic furnishings.
Using high-gloss paint can enhance the effect by reflecting light, which adds dimension to the room. Experimenting with a two-tone effect can also keep your design fresh while preserving a vintage vibe.
Consider these techniques to enhance your ceiling:
– Use painter’s tape for sharp, clean lines
– Combine two colors for a modern twist
– Paint the border in a high-gloss finish for added drama
– Choose colors that complement existing decor
This colorful approach not only captures attention but also creates a lively atmosphere that can elevate your everyday experience.
Fun fact: Bold ceiling border ideas with deep navy or crimson can visually expand a room by reflecting light. Two coats of high-gloss paint increase brightness and depth in a space.
Bold Color Accents
Editor’s Choice


4. Vintage Tin Tiles
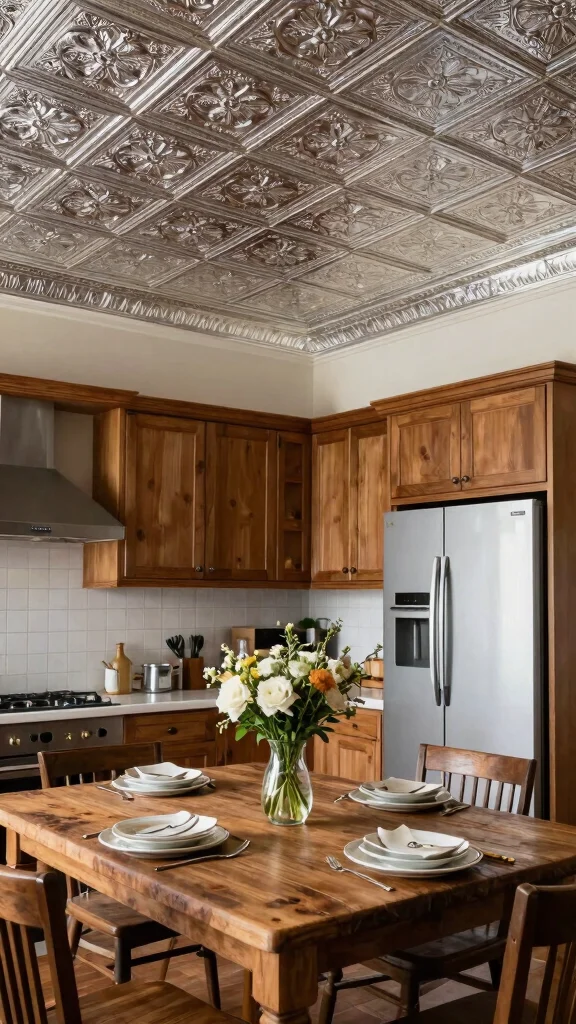
Vintage tin tiles serve as a delightful way to introduce both texture and history to your ceiling borders, effortlessly enhancing your space’s character. These tiles, available in a variety of styles and patterns, can add a playful yet refined touch, making them perfect for kitchens or dining areas. Their ability to be left in their original patina or painted to suit your decor allows for customized elegance.
Installing tin tiles is straightforward; they can be easily adhered around the ceiling edges for a quick upgrade. Their reflective surfaces catch light beautifully, creating an illusion of spaciousness that brightens your room.
Explore these ideas for incorporating tin tiles:
– Install tiles in a grid pattern for a classic look
– Paint tiles to match or contrast with your decor
– Use them in kitchens for a vintage feel
– Highlight them with accent lighting to enhance shine
This textured approach not only captures vintage charm but also creates a unique visual appeal that can enrich your home.
📹 Related Video: Do I need a border / filler for my Faux Tin Ceiling Tiles?
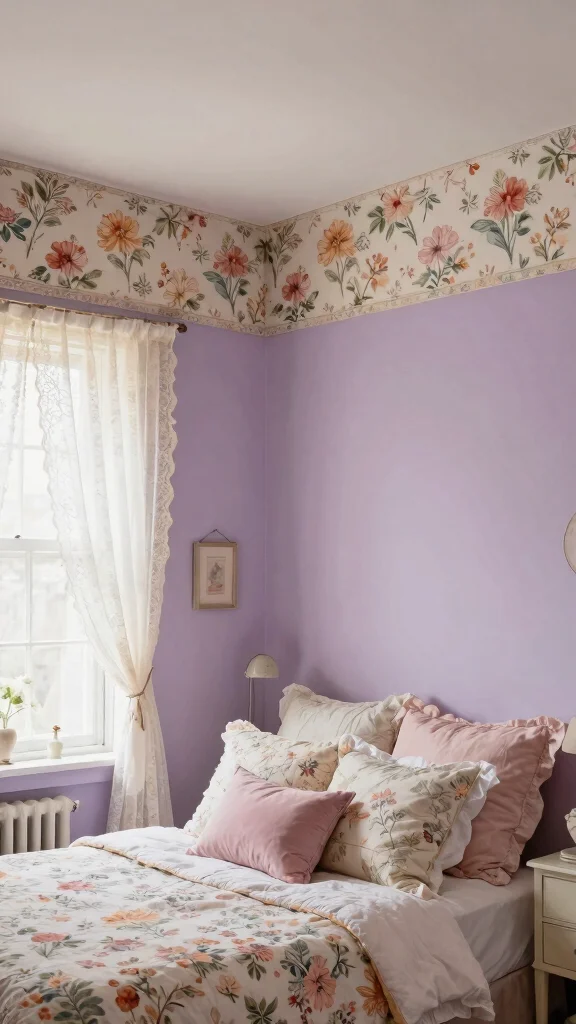
5. Wallpaper Borders
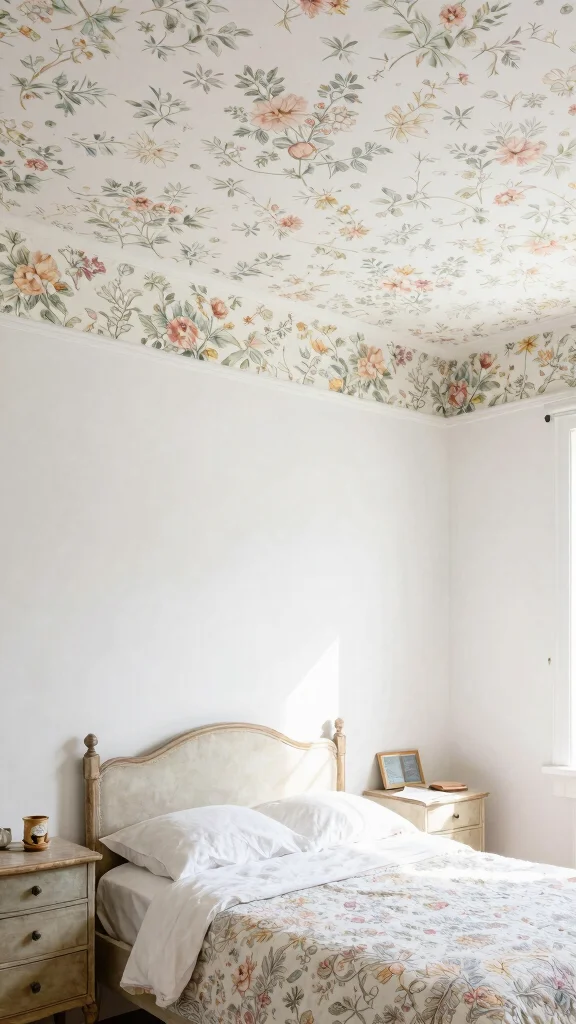
Wallpaper borders around your ceiling offer a clever way to unify your room’s design and infuse it with personality. By selecting vintage patterns like florals or damask, you can create a seamless connection between walls and ceiling that adds depth and visual interest. With a wide array of styles available, you can easily find options that harmonize with your overall decor.
Using removable wallpaper allows for easy updates, letting you experiment with different styles without commitment. This flexibility is ideal for showcasing your unique taste without overwhelming the space.
Here are some tips for using wallpaper borders:
– Choose bold patterns to make a statement
– Apply softer designs for a subtle touch
– Use removable wallpaper for easy changes
– Coordinate with your room’s color palette for cohesion
This technique not only elevates your decor but also creates an inviting atmosphere that reflects your personal style.
6. Simple Flat Moldings
For those who appreciate understated elegance, simple flat moldings make a timeless choice for ceiling borders. These moldings deliver a clean, polished appearance, allowing them to frame your room beautifully without stealing the spotlight. When painted in the same color as the ceiling, they create a seamless look, while contrasting hues can add a bold touch.
Flat moldings are a breeze to install, making them perfect for DIY enthusiasts. They complement vintage decor effortlessly, enhancing the overall aesthetic without overwhelming the space.
To maximize their impact, consider:
– Pairing them with larger decor pieces for balance
– Painting them in a contrasting color for emphasis
– Using them in minimalist spaces to maintain focus
– Combining with ceiling lighting for enhanced elegance
This simple yet effective design choice elevates your interior while keeping it refined and inviting.
Simple Flat Moldings
Editor’s Choice


You might also like
7. Fabric-Covered Borders
Fabric-covered borders introduce a delightful layer of texture and warmth to your ceilings, creating a cozy and inviting atmosphere. By using upholstery or vintage textiles, you can craft soft borders that beautifully complement your decor, making them especially suitable for bedrooms and nurseries. This approach softens the hard edges of your ceiling, adding a touch of comfort that draws you in.
Attaching fabric to a thin wooden frame or directly to the ceiling is a straightforward process that allows for customization. Opting for floral patterns or vintage prints can enhance your room’s charm while maintaining a unique flair.
Consider these tips for fabric borders:
– Choose washable fabrics for easy maintenance
– Attach fabric securely for durability
– Use contrasting colors to highlight your decor
– Incorporate patterns that resonate with your style
This textured approach not only enriches your space but also invites a sense of warmth that feels inviting and personal.
8. Arched Ceiling Borders
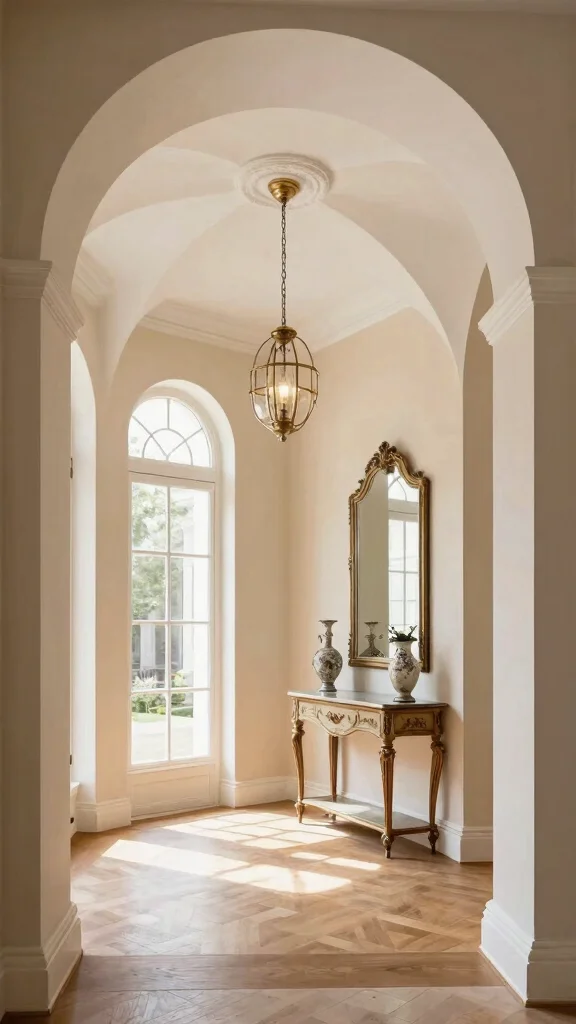
Arched ceiling borders add a touch of sophistication and elegance to your spaces, creating a soft and flowing line that enhances the overall aesthetic. This design is particularly effective in entryways and dining areas, where the gentle curve draws the eye upwards, making the ceilings feel higher and the room more expansive. Crafted from wood or plaster, these arches can be painted in soft tones to enhance the vintage appeal.
When combined with elegant lighting fixtures like grand chandeliers, arched borders evoke a romantic ambiance that transforms any room. This style can be especially captivating when paired with recessed lighting along the arch, highlighting its graceful shape.
Here are some ideas for utilizing arched borders:
– Create arches with plaster for a smooth finish
– Paint arches in light colors to enhance the vintage feel
– Pair them with elegant lighting for drama
– Use arches to frame special areas in your home
This design choice not only elevates your interiors but also enhances the sense of space and elegance throughout your home.
Arched Ceiling Borders
Editor’s Choice


9. Beadboard Ceiling Borders
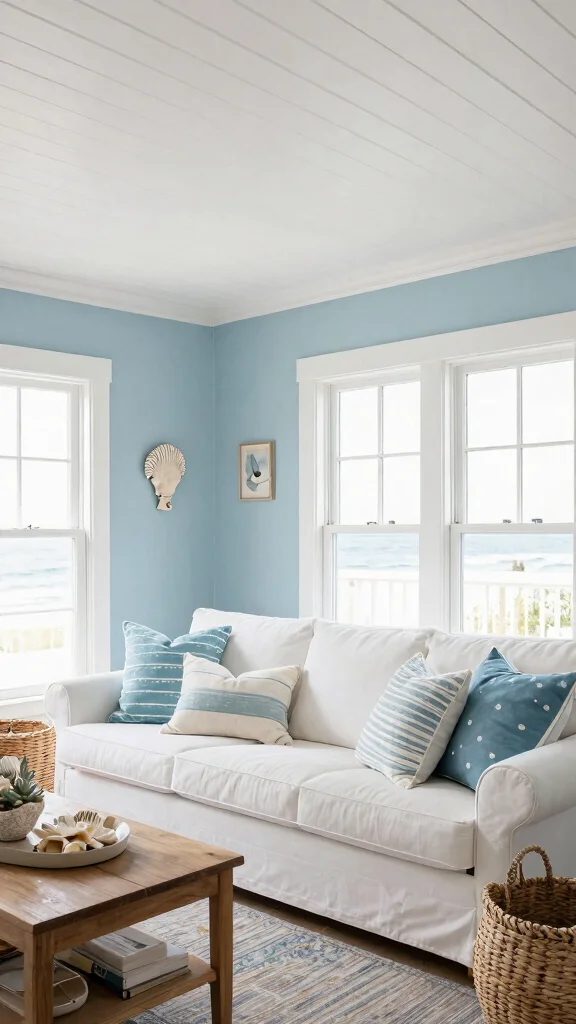
Beadboard ceiling borders provide a charming vintage touch that elevates your room’s character, adding warmth and craftsmanship. This style works beautifully in coastal or cottage-themed interiors, creating a relaxed and inviting atmosphere. Beadboard panels can be easily installed along the edges, bringing a sense of texture that captivates the eye.
When painted in light colors, beadboard can brighten your room while offering a clean, fresh look. Extending the beadboard into the center of the ceiling can create a unique design twist that goes beyond a simple border.
Consider these tips for beadboard borders:
– Paint beadboard in soft whites for a breezy feel
– Pair with nautical decor for a cohesive look
– Use beadboard in kitchens or dining areas for charm
– Highlight with lighting to enhance texture
This approach not only enriches your space but also fosters a cozy, welcoming environment that feels effortlessly stylish.
Key Trade-offs & Our Top Pick
Option 1: Ornate Plaster Moldings
– Pros:
– Offers a classic and elegant look that enhances any room.
– Provides excellent durability and can last for decades.
– Cons:
– Installation can be complex and may require professional help.
– More expensive than other options due to material and labor costs.
– Best for: Traditional or vintage-themed rooms where a touch of luxury is desired.
Option 2: Wood Beams with Decorative Trim
– Pros:
– Adds warmth and a rustic charm to your space.
– Can be customized to match your room’s existing decor.
– Cons:
– Wood may warp or crack over time, especially in humid environments.
– Heavier than other materials, requiring secure installation.
– Best for: Homes with a cozy, farmhouse style or those looking for a natural aesthetic.
Option 3: Bold Color Accents
– Pros:
– Instantly changes the room’s vibe and adds personality.
– Affordable and easy to apply as a DIY project.
– Cons:
– May clash with existing decor if not chosen carefully.
– Can become outdated quickly, requiring repainting.
– Best for: Renters or those who want a temporary change to spice up their interiors.
Option 4: Vintage Tin Tiles
– Pros:
– Unique texture and shine that captures the eye.
– Often comes in reusable or remnant tiles, making it budget-friendly.
– Cons:
– Can be challenging to maintain and clean, especially in kitchens.
– Installation might require specific adhesives or tools.
– Best for: Retro or eclectic homes that celebrate originality.
Option 5: Simple Flat Moldings
– Pros:
– Minimalist design fits various decor styles.
– Easy to install, making it ideal for DIY enthusiasts.
– Cons:
– May lack the visual interest of more detailed designs.
– Might not suit more ornate room styles.
– Best for: Modern or contemporary spaces that favor simplicity.
Expert Recommendation:
Best Overall: Ornate Plaster Moldings
Ornate plaster moldings often provide the best balance of elegance and durability. They add a timeless quality to your home, making them a worthwhile investment. While the installation may require professional help, the stunning result is typically worth the effort and cost. This option is versatile enough to suit various interior design accents, ensuring your space looks sophisticated for years to come.
Why We Picked This:
Different options appeal to various tastes and budgets. If you prefer a more rustic look, wood beams may be your best bet. For a temporary and easy update, bold color accents work well. Vintage tin tiles offer a unique flair for those who love retro styles. Each choice has its pros and cons, so think about what matches your needs and aesthetic preference best.
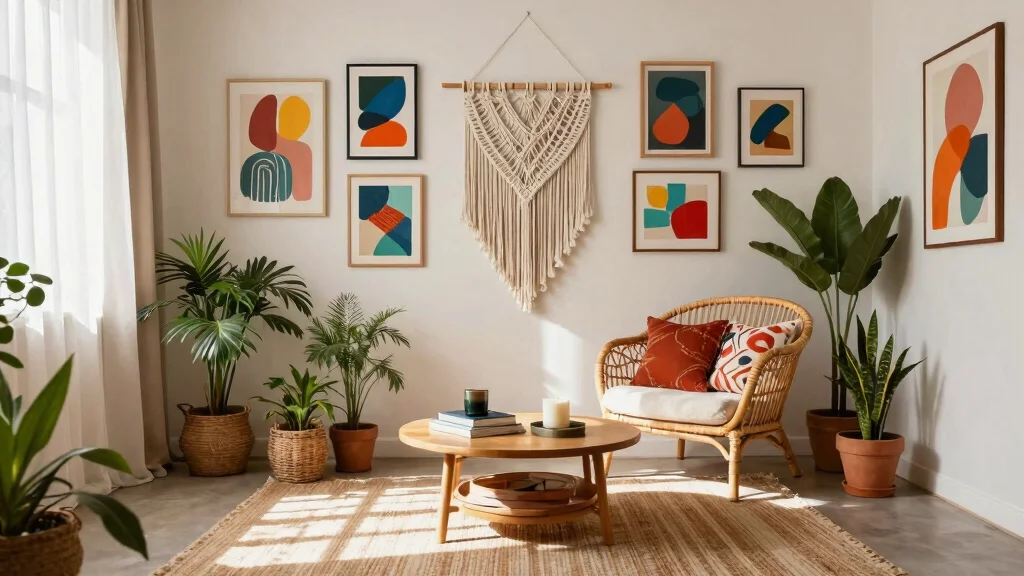
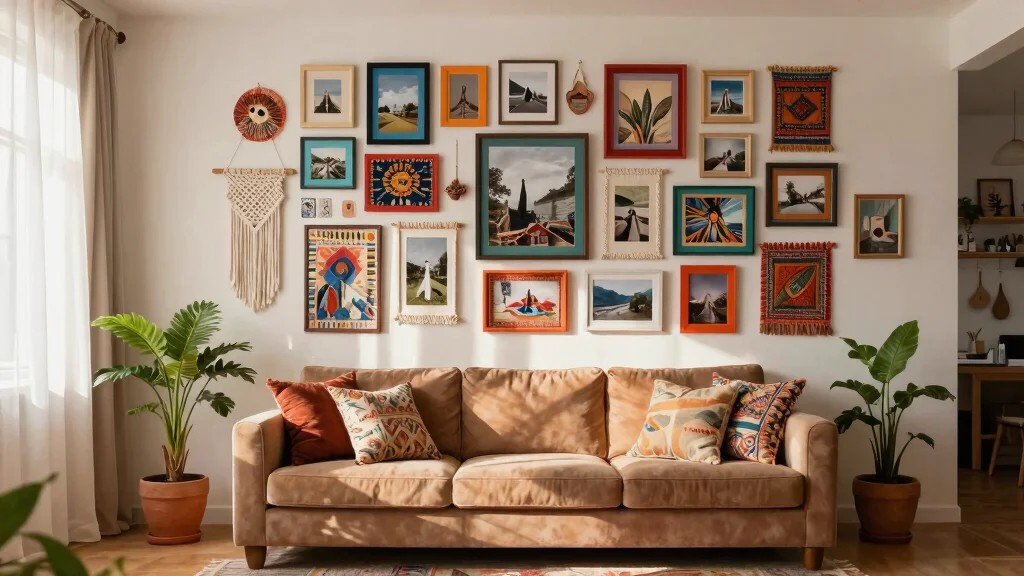
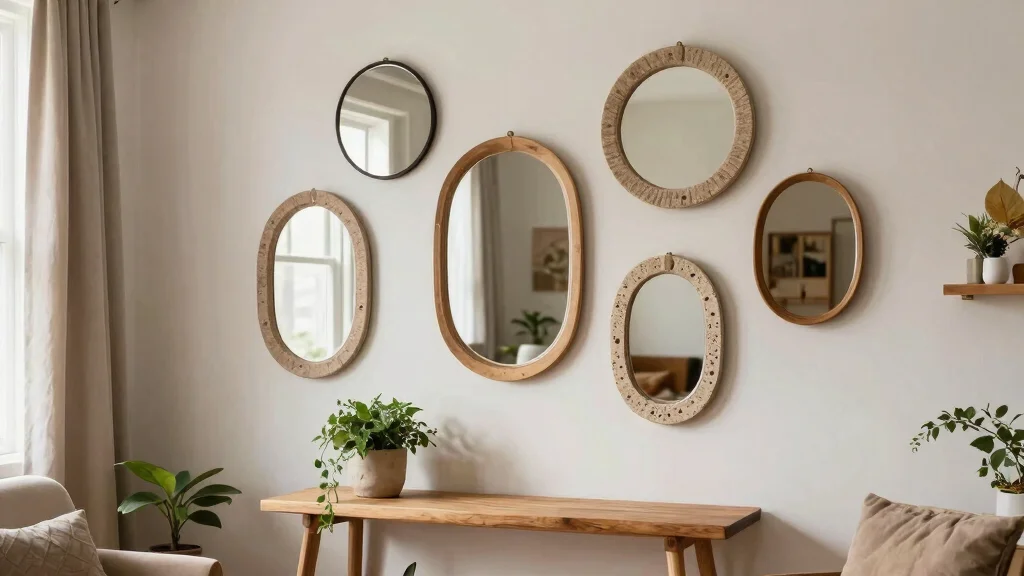
10. Vintage Picture Frames as Borders
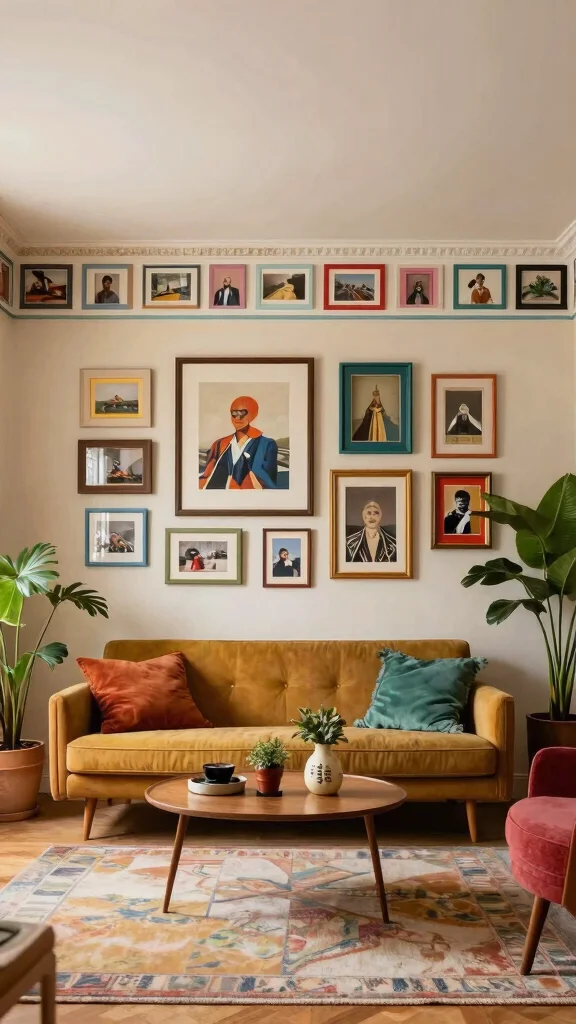
Repurposing vintage picture frames as ceiling borders creates an artistic and unique look in your rooms. This idea allows you to wrap your ceiling in a gallery feel, showcasing your favorite artwork or decorative pieces. Choose frames in various styles—whether ornate gold or rustic wood—to add depth and character to your space.
Painting the frames to match the ceiling or leaving them in their original finishes can create an eclectic vibe that reflects your personality. Just ensure they are securely fastened to prevent any accidents.
Try these ideas for using picture frames:
– Create a gallery effect with assorted frame styles
– Rotate displayed artwork for fresh looks
– Paint frames to coordinate with the room’s colors
– Use frames in unexpected shapes for creativity
This approach not only personalizes your decor but also transforms your ceiling into a stunning focal point that captivates guests.
You Might Also Like
11. Lattice Ceiling Panels
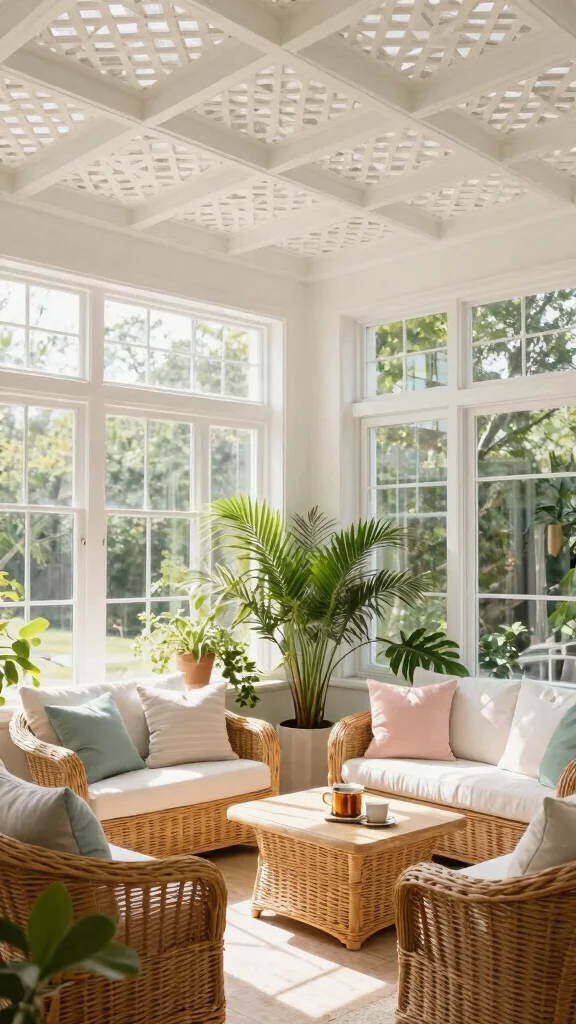
Lattice ceiling panels introduce refreshing architectural details that can enliven your interiors. Their crisscross pattern adds depth and visual appeal, all while maintaining a light and airy feel that suits bright spaces. Ideal for sunrooms or areas bathed in natural light, lattice borders can be crafted from painted wood or fabric for a unique twist.
The lattice design visually stretches the space, creating an illusion of higher ceilings and a more expansive atmosphere. Pairing lattice panels with light, flowing curtains can enhance the breezy vibe, making your space feel welcoming and open.
Explore these ideas for lattice borders:
– Install lattice panels in sunrooms for charm
– Paint lattice to match or contrast with walls
– Use fabric to add softness to the structure
– Complement with airy curtains for a cohesive look
This architectural choice not only beautifies your ceiling but also enhances the overall sense of space in your home.
Fun fact: lattice ceiling panels can visually add up to 15–20% perceived height to a sunlit room thanks to their crisscross pattern. When painted wood or fabric is used, the space stays airy, making your ceiling border ideas feel fresh and expansive.
12. Custom Starburst Borders
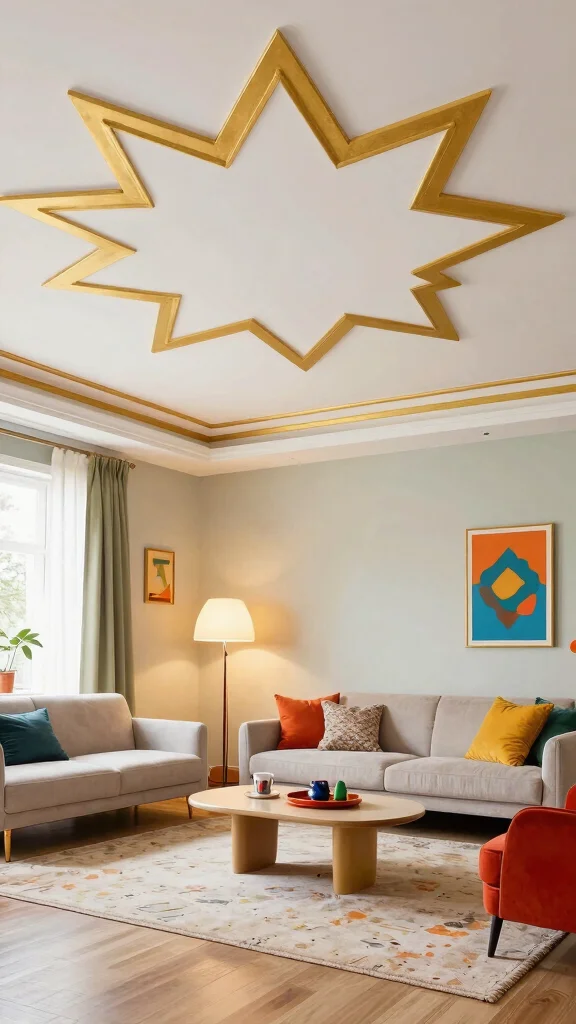
Custom starburst borders offer an eye-catching vintage accent that can transform your ceiling into a stunning focal point. These borders typically feature layered designs resembling starbursts or sunbursts, drawing the eye upwards and adding dynamism to the room. Perfect for retro-inspired spaces or modern designs that incorporate vintage elements, starburst shapes can be crafted from wood, plaster, or metal, with finishes ranging from painted to natural.
The layered effect adds depth and complexity, making your ceiling feel engaging and vibrant. Pairing starburst designs with bold lighting fixtures can further enhance their impact, illuminating your room with a radiant glow.
Consider these tips for starburst borders:
– Use layered materials for added dimension
– Paint in bold colors for a striking contrast
– Highlight with lighting for dramatic flair
– Integrate with retro decor for a cohesive theme
This creative approach not only captivates attention but also enriches your space with a sense of dynamic beauty.
Conclusion
Incorporating ceiling borders into your home decor can completely change the way you experience your space.
These vintage ceiling border ideas not only enhance the aesthetic but also add an element of surprise and elegance. Whether you prefer ornate moldings or playful fabric borders, there’s a style for every taste and room.
Don’t hesitate to experiment and find what resonates with your personal style. Tuning into the architectural details can lead to a beautifully framed and inviting room.
Note: We aim to provide accurate product links, but some may occasionally expire or become unavailable. If this happens, please search directly on Amazon for the product or a suitable alternative.
This post contains Amazon affiliate links, meaning we may earn a small commission if you purchase through our links, at no extra cost to you.
Frequently Asked Questions
What are some classic ceiling border ideas to frame your room beautifully?
Explore vintage-inspired options that frame a space beautifully. Think of a simple crown molding with a shallow profile, decorative ceiling edges with plaster rosettes, or layered trim to add depth using room framing techniques. To start, measure your ceiling height, choose a border height (around 3–5 inches works well in most rooms), and pick materials you can manage—wood for a traditional feel or foam/plaster-look alternatives for an easier install. Finish in a color that complements your walls to highlight architectural ceiling details, and don’t forget to test a sample trim against your décor before committing. This approach keeps ceiling border ideas practical, stylish, and true to your interior design accents and architectural ceiling details.
How do I choose the right ceiling trim designs for a vintage look in my room?
Start by matching scale to your space and ceiling height. For cozy vintage vibes, select ceiling border ideas with modest profiles (3–4 inches) for standard rooms, or go a bit taller in grand spaces. Consider ceiling trim designs that echo other architectural details—rosettes, cornices, or dentil patterns—to unify the look. Pick a finish (white, ivory, or antiqued patina) that harmonizes with your wall color and furniture. Use decorative ceiling edges as a focal point or as a subtle frame to your room framing techniques, and ensure the trim color complements your interior design accents rather than competing with them.
Is ceiling border installation a DIY project or should I hire a pro?
Both are viable paths, depending on your comfort level and the project’s complexity. For straightforward ceiling border ideas, DIY with pre-primed moulding, a miter saw, nails or adhesive, caulk, and paint. This works well for simple crown profiles and decorative ceiling edges in smaller rooms. If you’re working with complex corners, plaster details, or heavy wood moulding, hiring a pro can save time and ensure clean joints and a durable finish. Plan to budget for materials, fasteners, paint, and any additional framing adjustments, and remember—proper alignment with room framing techniques makes all the difference in achieving a polished look.
Which rooms benefit most from decorative ceiling edges and how to pair with interior design accents?
Dining rooms and living rooms often gain the most from ceiling border ideas, especially when you want a touch of vintage charm or architectural character. Pair ceiling border ideas with statement lighting like chandeliers or vintage sconces to enhance both mood and proportion. In bedrooms, a softer border can create a cozy frame around the ceiling, while in entryways and kitchens you can use more restrained profiles for a refined look. Throughout, let ceiling border ideas guide the room framing techniques and tie in interior design accents such as trim color, wall treatments, and furniture finishes to achieve a cohesive, stylish space.
What maintenance tips help vintage ceiling border ideas stay looking fresh over time?
Keep decorative ceiling edges looking pristine with regular dusting using a microfiber cloth or soft brush. For painted borders, touch up chips or scratches promptly with matching enamel or latex paint to preserve the vintage vibe. If you used wood, monitor for humidity changes to prevent warping, and reseal or repaint every few years to maintain the finish. Avoid harsh cleaners that can dull the surface, and when you clean, work in small sections to protect delicate ornamentation. With proper care, ceiling border ideas will continue to frame your room beautifully and retain their architectural charm.
Related Topics
home decor
vintage style
ceiling border ideas
decorative edges
architectural details
room framing
easy DIY
interior accents
home improvement
ceiling trim designs
design trends
beginner friendly